I have many favorite DIYs that I share here, but probably none as easy as this one! This Dollar Tree jewelry tray may be one of the easiest I’ve ever put together. I like how versatile it is AND it would make the sweetest little gift! Don’t blink though, because this tutorial is quick and easy!
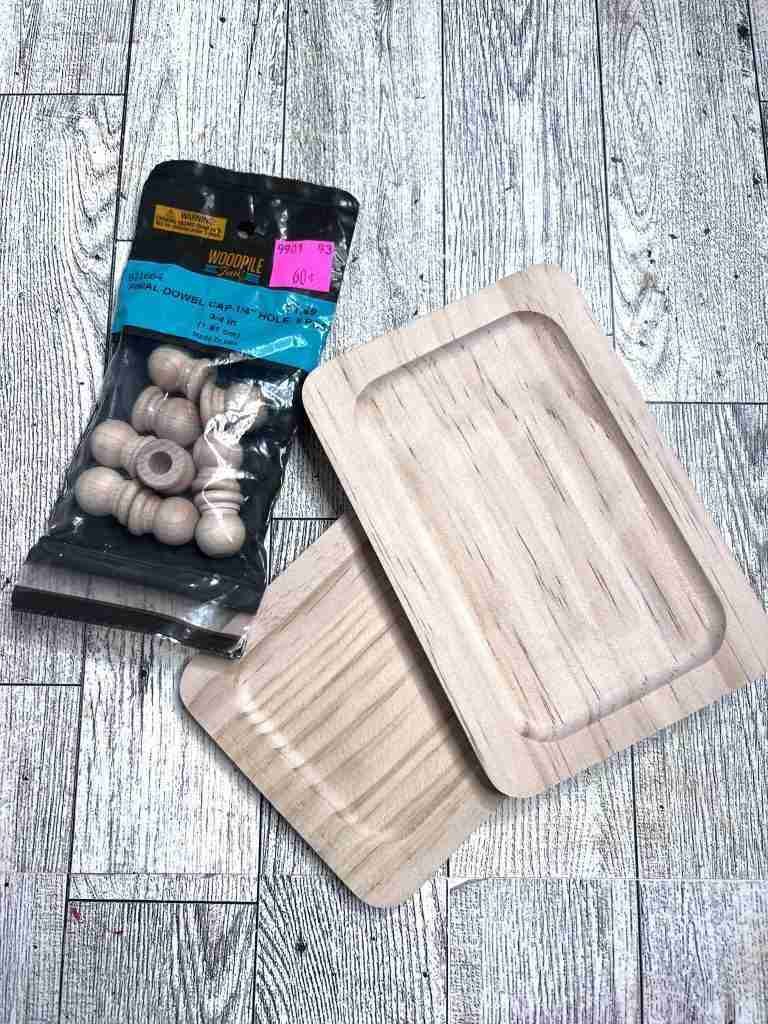
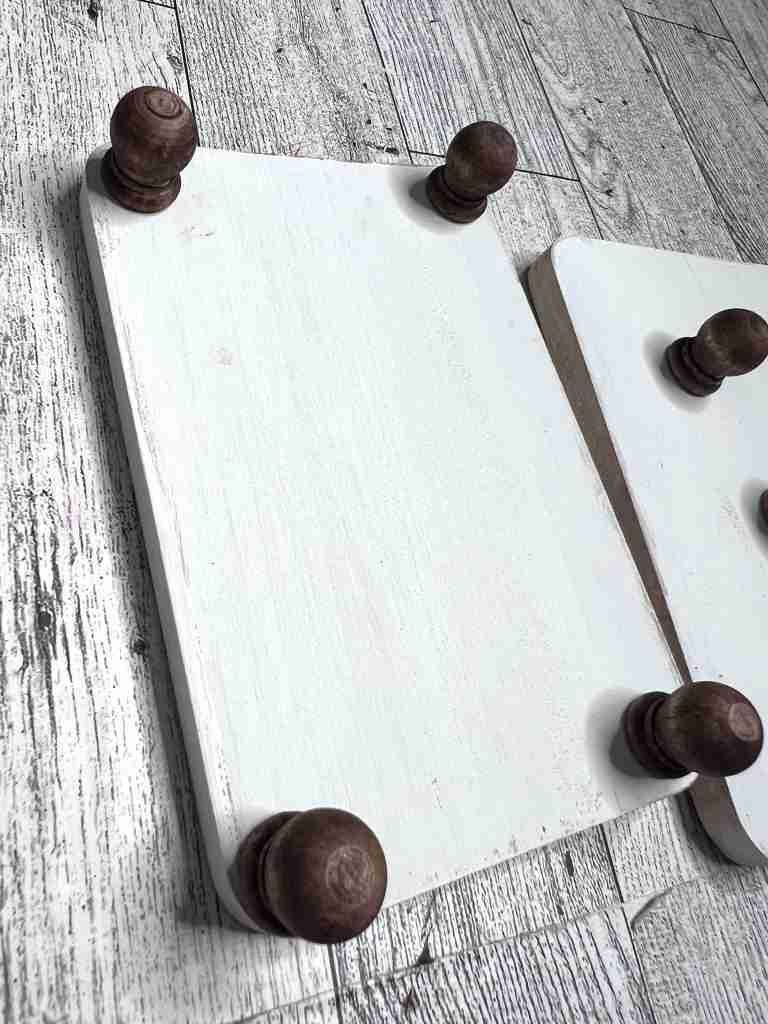
I’ll use two small, beveled wood trays from Dollar Tree and some small finial caps from Hobby Lobby that I’m using for feet. Keep in mind that Dollar Tree often has small wood shapes that would work as well, such as the small wood mushrooms that I saw recently. How cute would that be?!?
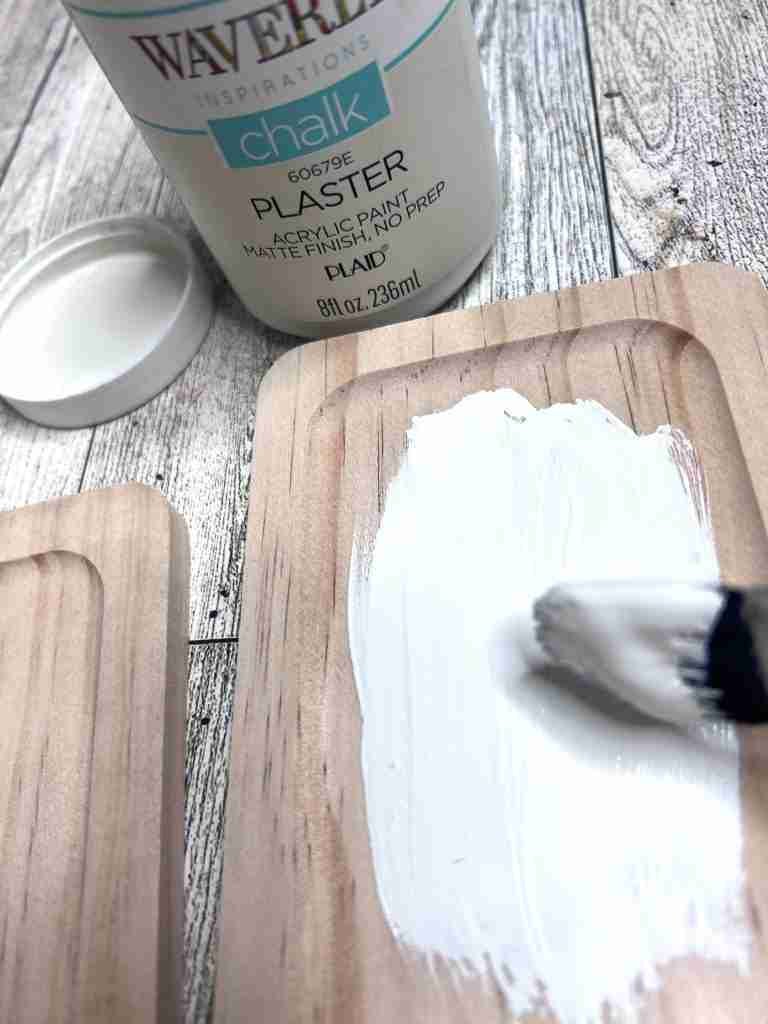
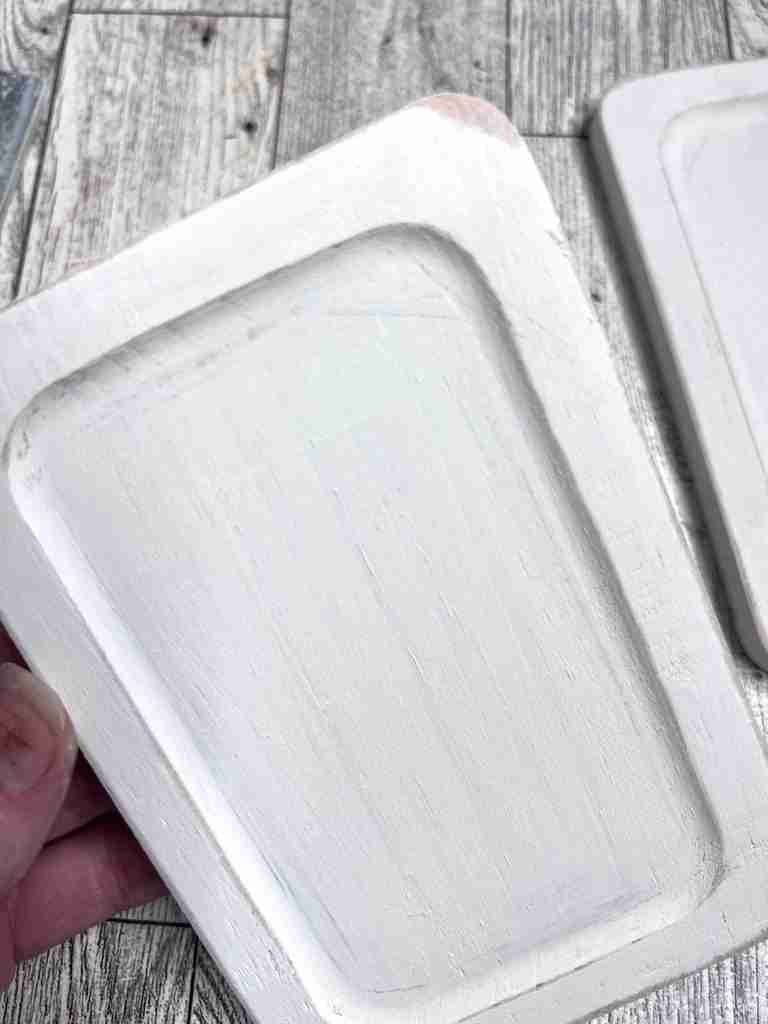
Now, paint the trays front, sides, and backs. I’m using Waverly chalk paint in Plaster. Allow to dry completely and then distress the edges with a sanding block or file.
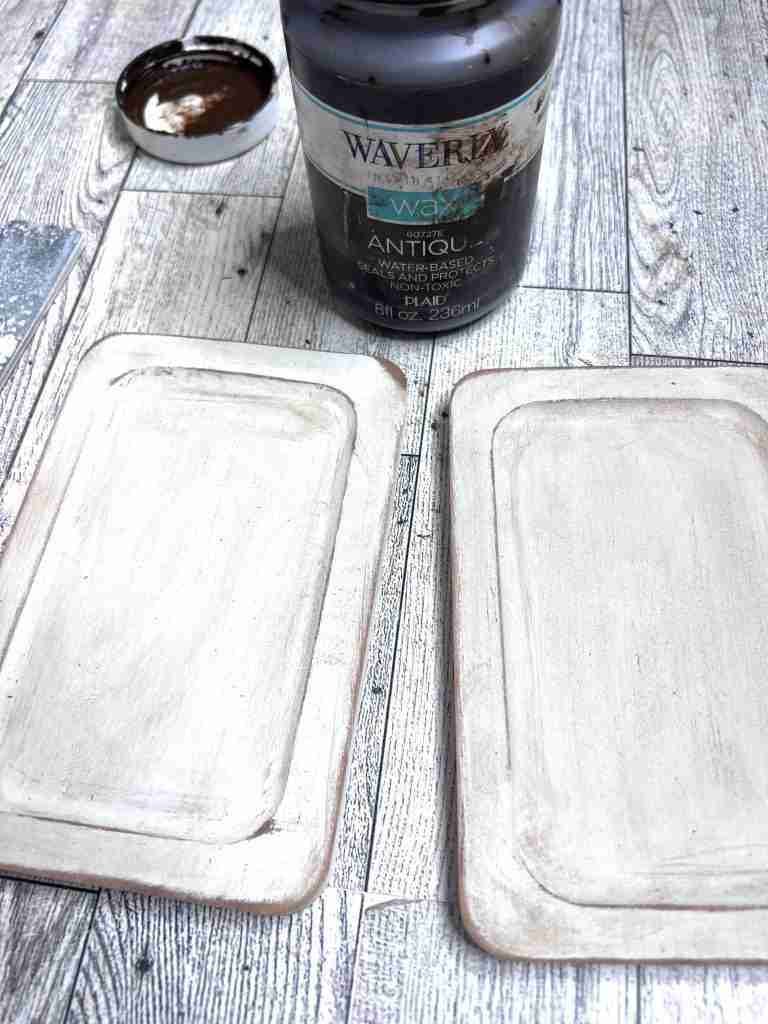
Next, add wax to the tray, being sure to cover those edges well. Use a damp cloth to wipe away the excess and all of the distressed areas will shine!
Lastly, take eight of the small finial caps and cover them with the Waverly Antiquing wax, wiping away the excess. Attach four to the bottom of each tray using E-6000 or other permanent glue and allow to dry for a few hours.
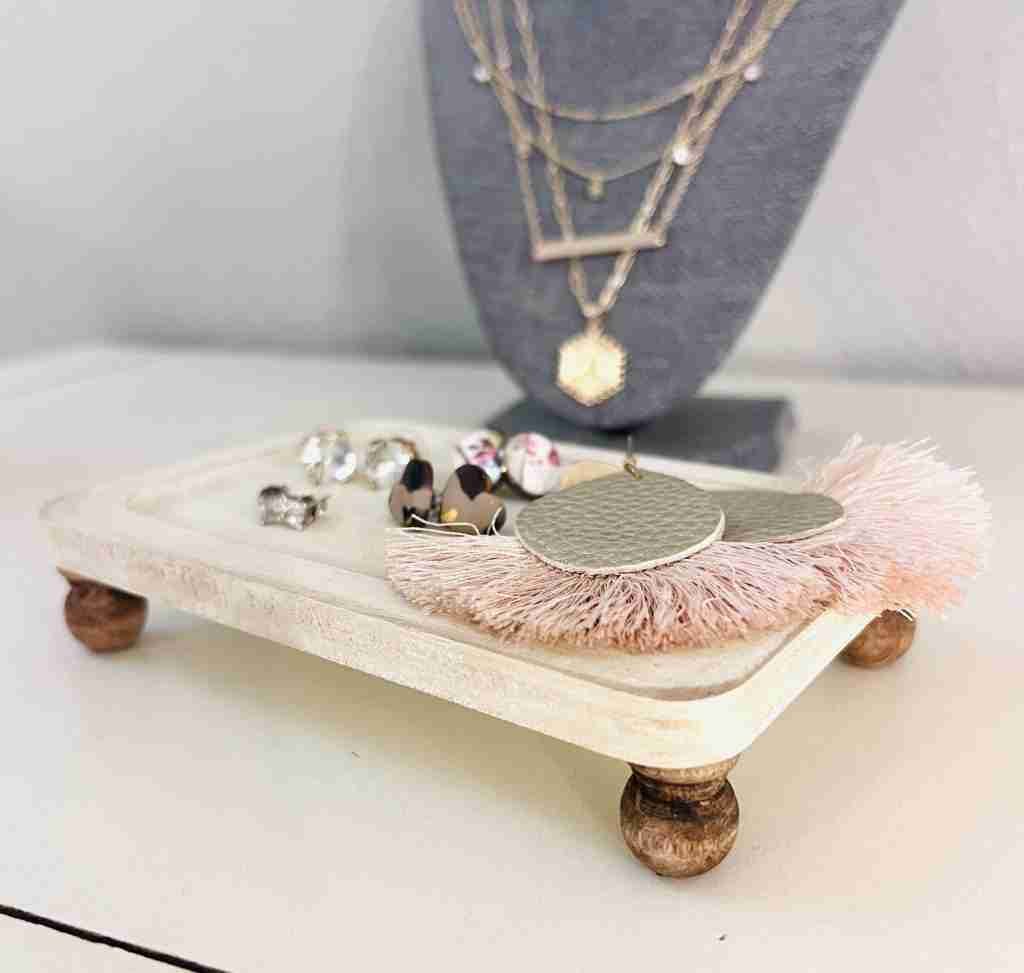
Now the little trays are complete and ready to be used! I’m using mine to hold my smaller earrings that I’m unable to hang. You could also use this little Dollar Tree jewelry tray on a bedside table for a catchall or for keys on an entryway table. Pair it with some cute earrings and it’s a perfect budget friendly gift for friends!


Creating a versatile piece I can always use in my home makes me so happy! How about you? Let me know what you think and if you make one for yourself!

More DIY for the home inspiration!
Free Printable Sweet Summertime Sign
Easy Dollar Tree Decorative Stand DIY
Simple Dollar Tree Riser DIY – Word & Home