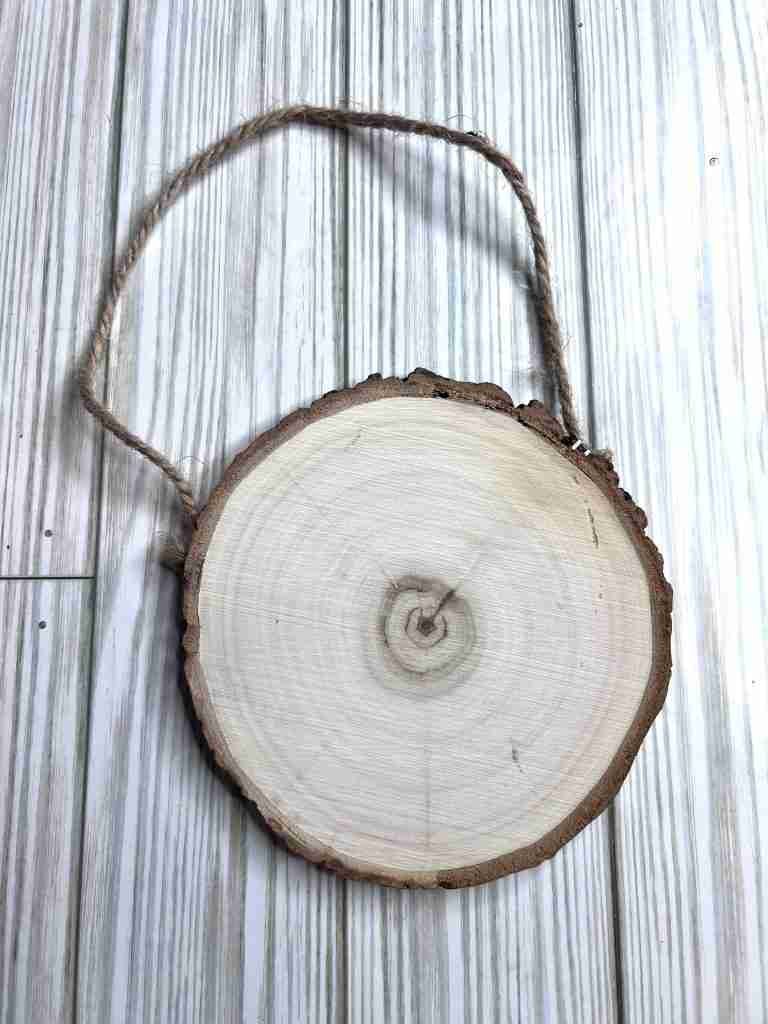
Wood slices have been a staple in my craft stash for a while now because they are so versatile and easy to use! I picked up a couple of these wood slices with hangers attached at Dollar Tree and they make the cutest ornaments for Christmas! Let’s use one to create a wood slice Santa ornament to hang on the tree!
Now, I’ll also be using a few other items for this DIY.
- Dollar Tree or Dollar General Wood Slice
- Waverly paint in the color Cashew
- Black, white, pink, and red paint
- 21 White Material Strips, about 9 inches long
- Rectangular Piece of Red Material, about 13 inches by 6.5 inches
- Small Dollar Tree Jingle Bell
- Sprig of Christmas Greenery
- Half Wood Bead
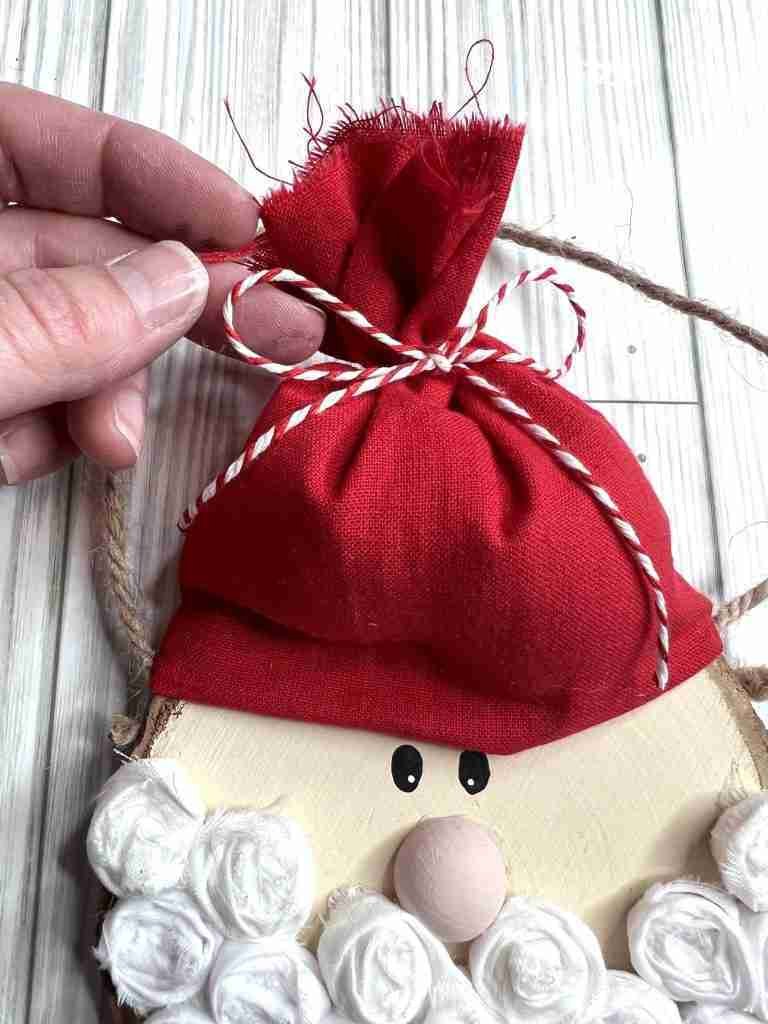
- Bakers Twine or String
- Small bit of Polyfil
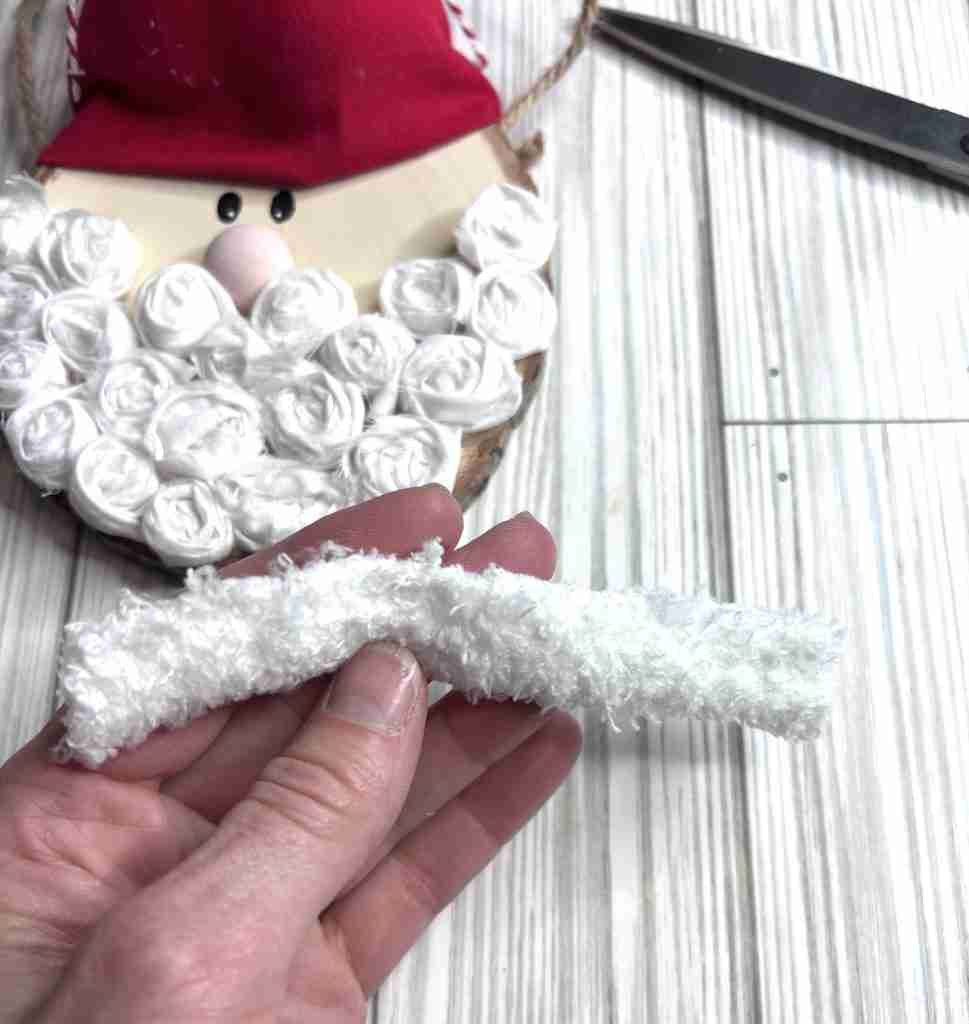
- Dollar Tree Fluffy Sock
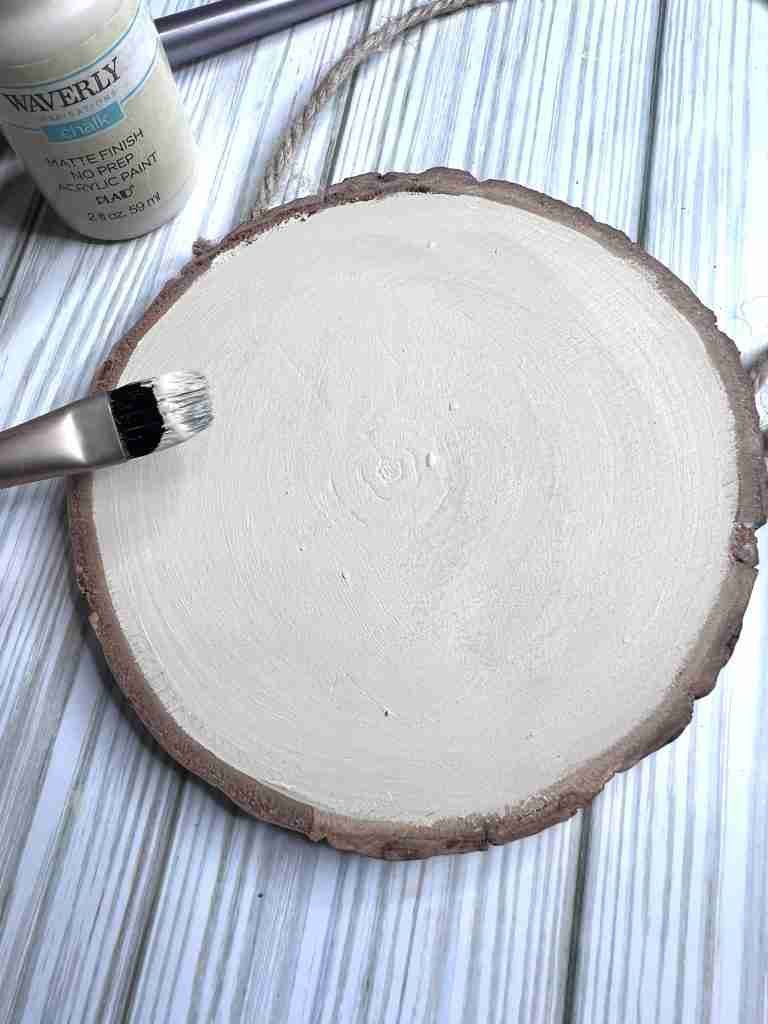
First up, paint the center of the wood slice with the Waverly Cashew paint color and let dry.
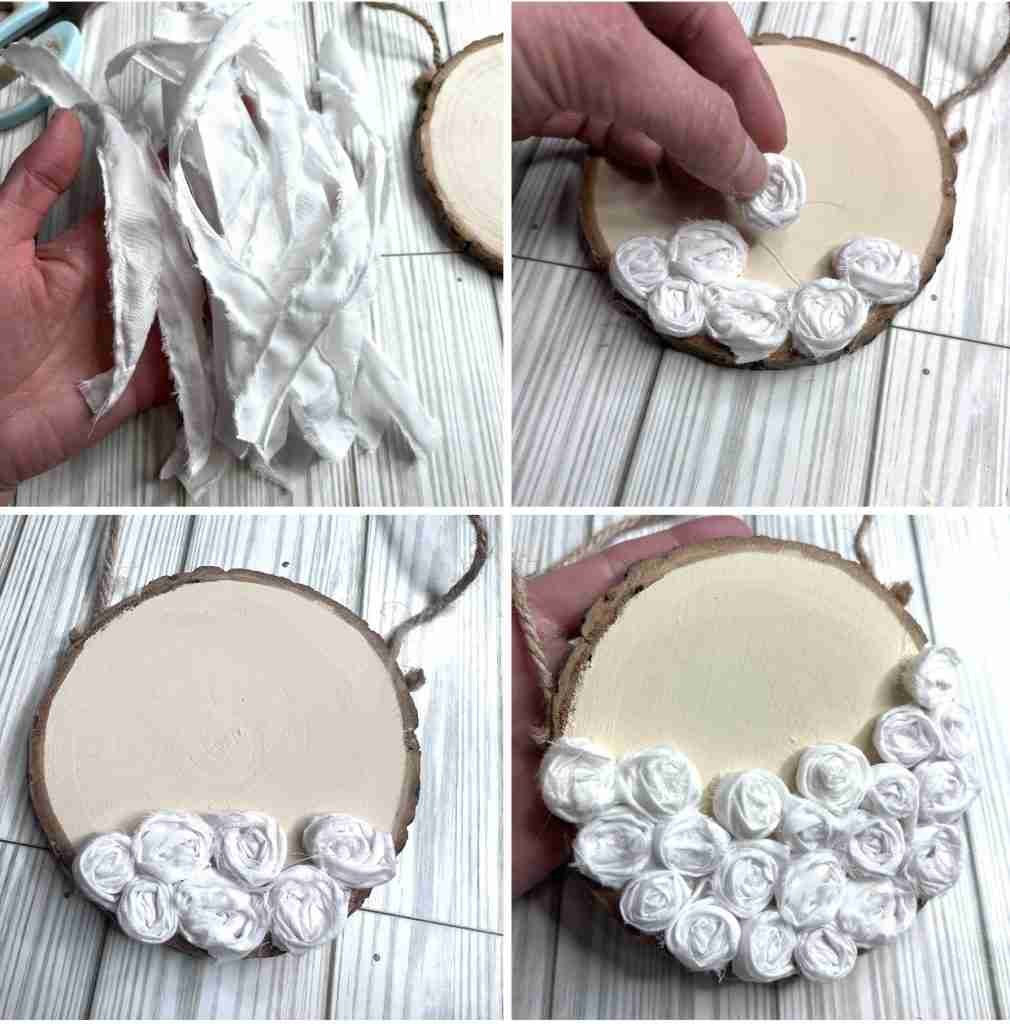
Next, roll up each strip of material slowly, adding a little hot glue on each section to hold it together and form a “rosette” that will be attached to the wood slice. Once all of these have been added they’ll look like Santa’s beard.
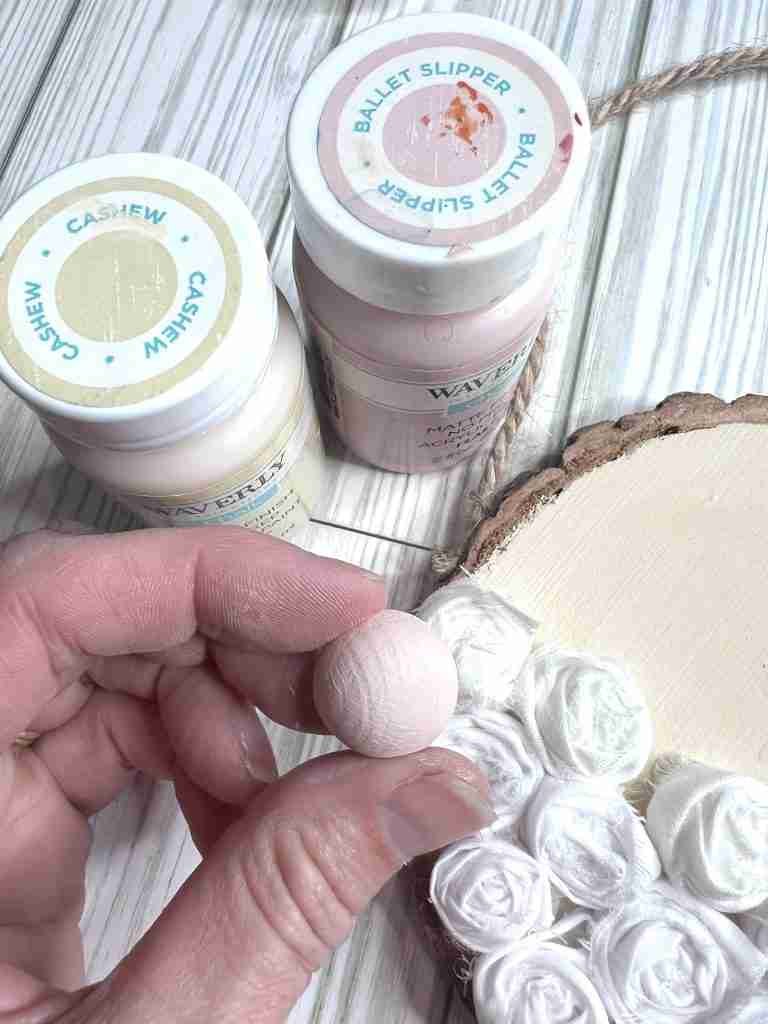
Now it’s time to add a face, using a half wood bead for the nose and black paint for eyes. I’ll paint the half bead Ballet Slipper Pink and add in a little red to darken it.

Santa’s Hat
Finally, create a hat for Santa using a piece of red material. Hot glue the ends together, pull it down on the top of the wood slice, and secure in place with a little hot glue.

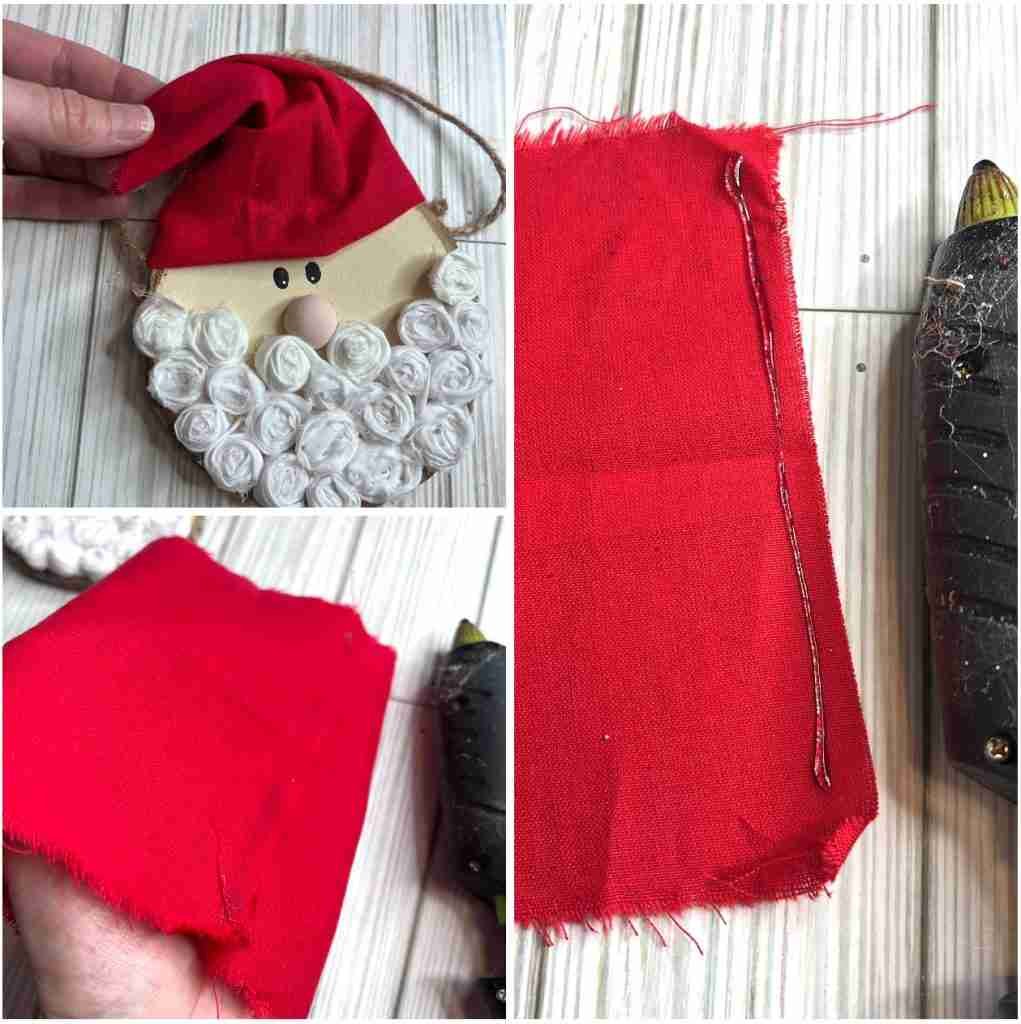
Next, the hat can be stuffed with a small amount of Polyfill, or this step can be skipped. Finish the hat by adding a brim using part of a Dollar Tree sock or felt. Tie the top of the hat with bakers twine and hot gluing the bell and greenery on.


Lastly, I decided to add a little pink to his cheeks to finish him off! Oh so cute! What do you think of Santa? Let me know if you give this wood slice Santa ornament DIY a try!


Easy DIY Cardboard Snowman Ornament
Dollar General Christmas Ornament – Simple Make-Over